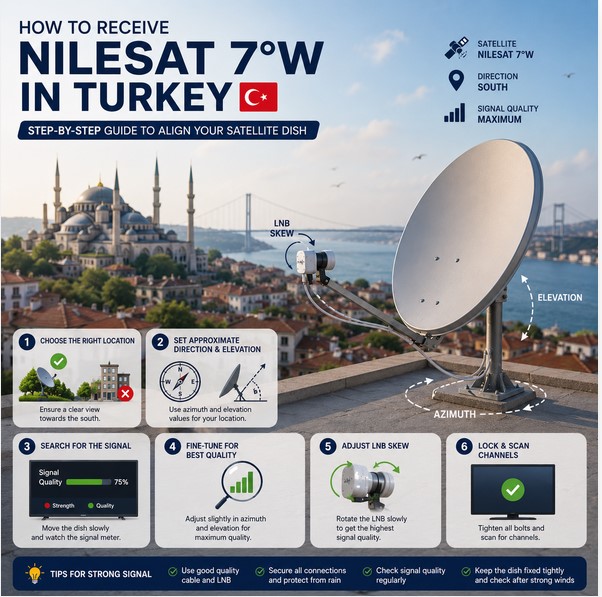

Receiving Nilesat in Turkey can be different from setting up the same satellite dish in North Africa. Your location inside Turkey, the size of the dish, the satellite signal coverage and the quality of the installation can all affect the final result.
The best way to search for Nilesat is to avoid moving the dish randomly. A practical approach starts with preparing the installation, identifying the approximate satellite position and then making slow, controlled adjustments while monitoring the signal.
This guide explains the main steps for finding and receiving Nilesat 7°W in Turkey.
Step 1: Check Your Exact Location in Turkey
Turkey covers a large geographical area, so Nilesat alignment settings can change from one city to another.
A dish installed in:
- Istanbul
- Ankara
- Izmir
- Antalya
- Bursa
- Konya
- Adana
- Trabzon
will not necessarily use exactly the same pointing angles.
Before starting the alignment, determine the approximate:
- Azimuth – the horizontal direction of the dish.
- Elevation – the angle above the horizon.
- LNB Skew – the rotation angle of the LNB.
These values provide a useful starting point.
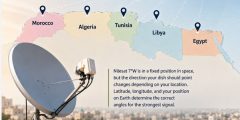
Remember that 7° West is the satellite’s orbital position, not a simple instruction to point the dish directly toward the west.
From Turkey, Nilesat generally appears in the southern part of the sky, but the exact direction depends on your location.
Step 2: Choose a Location with a Clear View
Before installing the dish, inspect the sky in the expected satellite direction.
The signal path should be clear of obstacles such as:
- Tall apartment buildings.
- Trees.
- Chimneys.
- Roof edges.
- Balconies.
- Hills or mountains.
- Nearby structures.
A satellite signal can be blocked even when an obstacle appears to be a considerable distance away.
For the best chance of successful reception, choose an open installation point with a clear line of sight.
Step 3: Make Sure the Mounting Pole Is Vertical
A satellite dish should be mounted on a strong and stable pole.
Before adjusting the dish, use a spirit level to make sure the mounting pole is perfectly vertical.
This is an important step because the elevation markings on the dish bracket can become inaccurate if the pole is leaning.
A vertical pole makes it easier to:
- Set the elevation correctly.
- Search for the satellite.
- Fine-tune the signal.
- Keep the dish stable.
Do not begin the alignment process until the mounting pole is secure.
Step 4: Prepare the Receiver Settings
Before moving the dish, open the satellite setup menu on your receiver.
Select:
- Satellite: Nilesat 7°W.
- LNB Type: Universal, if supported by your equipment.
- LNB Settings: According to the specifications of your LNB.
- DiSEqC: The correct port if you use a multi-satellite installation.
Then open the receiver’s signal meter.
If possible, use a reliable active signal or transponder appropriate for the Nilesat position as your reference during the alignment process.
The receiver should be ready to display changes in signal quality while the dish is being adjusted.
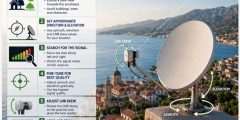
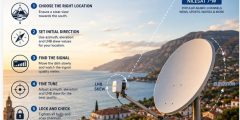
Step 5: Set an Approximate Starting Position
Use the approximate azimuth and elevation values for your city as a starting point.
Set the elevation on the dish bracket.
Then point the dish toward the expected part of the sky.
Do not expect the first position to produce a signal immediately.
The purpose of the starting position is to place the dish close to the correct satellite path before beginning the detailed search.
Step 6: Search for the Signal Slowly
The search should be performed using very small movements.
Start by moving the dish slowly from left to right.
After each small movement:
- Stop.
- Wait a few seconds.
- Check the signal quality.
- Continue if necessary.
Avoid moving the dish quickly.
Satellite receivers may need time to update the signal meter. A fast movement can cause you to pass through the correct position without noticing a signal.
Once a signal appears, stop making large movements.
Step 7: Make Sure You Have Found Nilesat
Finding a signal is not always the same as finding Nilesat.
Other satellite positions may be located close to the area you are searching.
After a signal appears:
- Check the satellite selected by the receiver.
- Perform a channel scan.
- Review the channels that are detected.
- Confirm that the services match the Nilesat position.
Do not rely only on the signal strength reading.
Signal Quality and the detected services are more useful for confirming that you have found the correct satellite.
Step 8: Fine-Tune the Dish for Better Reception
After confirming Nilesat, begin the fine-tuning stage.
Adjust the horizontal direction using extremely small movements.
Watch the signal quality carefully.
When you find the best horizontal position, adjust the elevation.
Move the dish slightly upward or downward.
The strongest signal is often found through very small changes.
The difference between weak reception and stable reception can sometimes be only a few millimetres of dish movement.
Step 9: Adjust the LNB Skew
The LNB rotation can affect the final signal quality.
After finding the best dish direction and elevation:
- Loosen the LNB holder slightly.
- Rotate the LNB slowly.
- Monitor the signal quality.
- Stop at the highest stable reading.
- Tighten the holder carefully.
The correct LNB skew depends on your location in Turkey.
The final adjustment should therefore be based on the actual signal quality rather than relying only on a general visual position.
Step 10: Secure the Dish Carefully
Once you have reached the best signal, tighten the dish bolts gradually.
Do not tighten everything at once.
Tightening a bolt can slightly change the dish position and reduce the signal.
After tightening each section, check the signal quality again.
Before finishing, inspect:
- The mounting bolts.
- The elevation adjustment.
- The LNB holder.
- The satellite cable.
- The receiver connection.
Why Nilesat Reception Can Be Different Across Turkey
Turkey is a large country, and reception conditions can vary.
The main factors include:
- Your exact location.
- Satellite coverage.
- Dish size.
- Dish quality.
- LNB quality.
- Local obstacles.
- Cable quality.
- Weather conditions.
For this reason, there is no single dish position that works perfectly in every Turkish city.
A location-specific starting point followed by careful fine-tuning provides the best approach.
What Dish Size Is Suitable for Nilesat in Turkey?
The suitable dish size depends on your location and the signal coverage available in your area.
In some locations, a smaller dish may receive strong signals, while other areas may require a larger dish to achieve stable reception.
Before choosing a dish, consider:
- Your city.
- Local reception conditions.
- The channels or services you want to receive.
- The required signal margin.
A correctly aligned dish is often more important than simply choosing the largest possible size.
However, in areas where the signal is weaker, additional dish size may provide a better reception margin.
What to Do If You Cannot Find a Signal
If no signal appears, stop moving the dish randomly and inspect the installation.
Check the Cable
Look for:
- Loose connectors.
- Damaged cable.
- Water entering outdoor connections.
- Poor cable quality.
Check the LNB
Make sure the LNB is correctly connected and positioned.
Review Receiver Settings
Confirm:
- The correct satellite.
- LNB settings.
- DiSEqC configuration.
- Cable input.
Check for Obstacles
Make sure that no building, tree or other structure is blocking the signal path.
Start Again from the Approximate Position
Return to the expected starting direction and repeat the search using slow movements.
A systematic method is more effective than random adjustments.
How to Keep the Signal Stable
After successfully aligning the dish, occasional maintenance can help maintain stable reception.
Check for:
- Loose mounting bolts.
- Dish movement after strong winds.
- Damaged cables.
- Water around outdoor connections.
- LNB movement.
- New obstacles, including tree growth.
A small change in dish position can reduce the signal quality, especially when the dish has a limited signal margin.